


The horticulture experts at Baker Creek start hundreds of thousands of seeds each year and field thousands of questions about seed starting and gardening.
And while there’s no foolproof, can’t-miss guarantee that your seeds will thrive in their journey from seed packet to the garden, here are some of the biggest seed-starting issues and our recommendations for how to avoid them!
When Should I Sow My Seeds?
It depends on your growing climate, so timing is everything. Most seeds need warmth to germinate, but when you sow them depends on your growing zone. Here in southern Missouri, in USDA Zone 7a, we can start many heat-loving crops indoors in February or March, while colder climates might need to wait a few weeks longer.
Check your local frost dates and use a regional planting calendar as your guide. A little planning goes a long way in making sure your seeds hit the soil at just the right time.
The USDA offers an interactive map of hardiness zones, searchable by zip code.
The National Gardening Association offers this handy online tool for looking up your average first and last frost dates by zip code.
For more of our favorite gardening resources, see this blog post.

Should I Direct Sow or Start Seeds Indoors?
Some crops are happiest started indoors; think tomatoes, peppers, and eggplants. Starting early gives them time to mature before hot summer weather arrives. Others, like carrots, radishes, beets, and peas, prefer to be directly sown right into the garden. Root crops especially dislike transplanting, so they perform best when their seeds go straight into prepared soil. Long-season crops like onions, leeks, and celery, need an extra head start indoors, especially in short-season climates.
As a rule of thumb, transplant heat-lovers and direct sow cool-season crops and root crops.
Choose the Right Soil For Your Seeds
Your seeds need a cozy place to start, one that is light, fluffy, and full of life. Skip heavy garden soil in trays or pots, as it’s often too dense and can harbor disease. Instead, use a high-quality seed-starting or potting mix. Here at Baker Creek, we love using Royal Gold potting soil. It holds moisture well, drains beautifully, and creates the perfect environment for tender new roots. A great mix is one of the simplest ways to improve your germination success.
Plant Seeds at the Right Depth
When starting seeds, adhere to the old rule that says, “the smaller the seed, the closer to the surface you plant it.” This makes perfect sense, as a seed contains finite energy to put down a tiny root and push the seed leaves toward the soil surface. Planted too deep, a seed can run out of juice before it breaks through and has a chance to produce its own energy through photosynthesis. Follow the planting instructions on your seed packets; many seeds need light to germinate. Consider pre-watering your seed starting medium to avoid watering in the seeds too deeply.
Pay Attention to Soil Temperature
Soil temperature has a lot to do with how long a seed takes to germinate, and this varies widely from crop to crop. Most vegetable seeds do best in temperatures ranging from 70 to 80 F, but garden peas and lettuce can germinate in soil temperatures in the 30s! Indoors, a basic heat mat can help maintain consistent warmth, especially for tropical crops like melons, okra, and basil. Cool-season crops like lettuce, spinach, and cabbage will sprout in lower temps, but they still appreciate soil that’s not too cold or soggy.
We highly recommend using a digital kitchen thermometer to check soil temp. Consult this chart for minimum, optimal, and maximum temperatures for a variety of vegetables.

Keep Seeds Moist -- But Not Too Much!
Seeds need steady moisture to wake up, but not too much. Aim for an environment that’s evenly damp, like a wrung-out sponge, not a sopping wet one. Remember that some seeds can take upwards of a month to germinate. It can be a challenge to keep them evenly watered for that long – but the seeds will die if they get too dry for too long. The best prevention is a clear humidity dome or plastic wrap that keeps in the moisture. If you see condensation on the cover, you don’t need to water. If you don’t see condensation, give those seeds a drink, preferably from the bottom tray and not the soil surface.
Once the seedlings emerge, remove the covers to allow airflow and prevent mold. And remember to pre-water your potting mix and soak seeds into damp soil to avoid them being washed away or over soaked.
Shine a Light on Your Seeds
Once sprouted, almost all seedlings need strong, consistent light. A sunny window may do the trick, but a simple grow light often yields sturdier results, especially in cloudy regions or on short winter days. Don’t forget—some seeds need light to germinate. Tiny seeds like celery, parsley, and lettuce should be gently pressed onto the surface of the soil, not buried, so they can soak up just enough light to get growing.
Full-spectrum LED-type lights are the best choice for indoor growing. These lights emanate the full color spectrum plants need for optimal growth, and they are energy efficient. Full-spectrum fluorescent lights also work well, though.
Remember that the job of an indoor light system is to mimic the sun, and the intensity of the light is key to that. Keep the lights close to the seedlings. How close? Place your hand at the top of the seedlings and lower the light source until you can feel heat on the back of your hand. This is the sweet spot. As the plants grow, raise the light source so the leaves don’t burn.
Feed Your Seeds
Soil nutrition is an important part of raising a healthy, successful crop of garden seedlings. At Baker Creek, we use a Royal Gold soil blend with a light nutrient charge. Seeds don’t require fertilizer until they begin forming true leaves. We use locally sourced worm castings from which we make a tea, and then a water soluble, organically balanced NPK fertilizer. We have also used fish emulsion. Whatever fertilizer you choose, use a light hand by diluting it to one-quarter strength, and make sure to follow the manufacturer's recommendations. You can always add, but you can’t subtract!
Top Tips for Hardening Off Seedlings
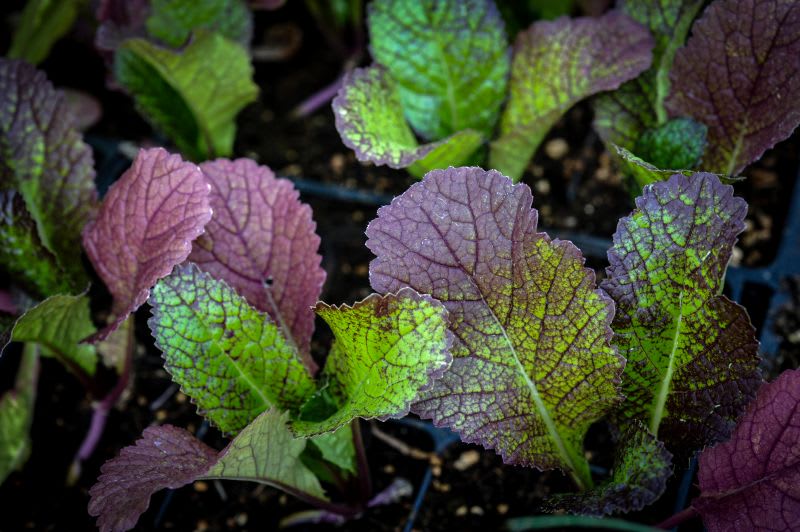
Hardening off is the process of acclimating your seedlings to the real world. Up to this point in their journey, they’ve been coddled, growing up with a steady temperature and without wind or direct sunlight.
But you can’t just throw them out there and hope for the best; at first, move the seedlings outside to a place with limited exposure to sun. Let them feel the breeze and get used to rising and falling temperatures. Bring them inside at night and take them back outside during the day. Each day, give them a little more sun. After a week or 10 days of brighter light, they should be ready for transplant.
But keep a close eye on the forecast: You don’t want to subject the tender ones to frost!
Key Takeaways
- Sow seeds based on your climate, checking your average frost dates and consulting a regional planting guide.
- Not all seeds are created equal; some prefer to be started indoors (warm weather crops like tomatoes and peppers). Others, such as root vegetables and cool-weather crops like radishes and peas, prefer to be direct sown in the garden.
- Use high-quality seed starting mix and avoid starting seeds indoors in plain old garden soil.
- Track the soil temperature by using a soil temperature probe or kitchen thermometer, and use a heat mat if necessary.
- As seeds are germinating, use a humidity dome or cover with plastic. Remove when the seeds emerge.
- Almost all seedlings need strong, consistent light. Indoors, full-spectrum LED lights or full-spectrum fluorescents are recommended.
- Give your seedlings time to acclimate to outdoor conditions before putting them in the ground. They'll thank you later.
About the Author
John Lenz:
Visitors to Baker Creek’s Mansfield, MO, seed store may know John Lenz as an affable and loquacious storekeeper, but he is also a horticulture expert who oversaw our greenhouse program during a time of rapid expansion. He has a degree in horticulture from New Mexico State University and an MBA from St. Leo University in Florida. Stop in and say hello if you are visiting our Mansfield, MO, location!
You can always email your gardening questions to seeds@rareseeds.com. Put "hort question" in the subject line, and John or someone else on the horticulture team will get back to you.


