

Herb Garden Growing Guide
Skip to main content
Here at Baker Creek, we've always believed the best gardens are the ones that feed you, heal you, and feed the neighborhood bees and butterflies. And there's no easier way to do all three at once than by growing herbs.
A single patch of oregano flavors your pizza all summer long—and when you let it bloom, it becomes one of the best pollinator plants in the garden. A row of dill gives you everything you need for pickles and fish, while swallowtail caterpillars happily munch the extra fronds. And a cup of chamomile tea picked ten minutes ago from your own front porch? That's a kind of luxury money can't buy.
This guide covers about thirty of our favorite culinary, tea, and pollinator herbs, with honest advice on when to plant them, how to start them, what can go wrong, and how to keep the harvest going all season. Whether you're gardening on a fire escape in Brooklyn or on five acres in east Texas, we've built this around the freeze dates and growing seasons that actually matter where you live.
• • •
The Three-Tier System: A Simple Way to Think About Herbs
Nearly every herb falls into one of three planting "models." Get this straight in your head, and the rest of the planning falls into place.
Tier One: The Frost-Tender Summer Lovers
These herbs want warmth and will turn to mush at the first sign of frost. Start them indoors a few weeks before your last spring freeze, then set them outside once the danger has truly passed. Think basil, stevia, lemongrass, and the wonderfully weird toothache plant. Also in this group: papalo—a Mexican cilantro substitute that actually thrives when summer heat sends regular cilantro bolting to the sky.
Tier Two: The Cool-Season Direct Sowers
These are the herbs that prefer to be planted right where they'll grow, often while it's still chilly out. Cilantro, dill, chives, chamomile, borage, and sorrel all do best sown directly in cool soil. Dill in particular has a long taproot that doesn't appreciate being transplanted—sow it where it'll live and leave it be.
Tier Three: The Perennial Backbone
These are the herbs you plant once and enjoy for years. Start them indoors from seed, transplant them out after your last freeze, and watch them come back stronger every spring. Lavender, bee balm, thyme, oregano, lemon balm, yarrow, and echinacea are the pillars of a pollinator-friendly herb garden that practically runs itself once established.
The One-Two-Three Shortcut
To plan your herb garden in five minutes: pick 2–3 herbs from each tier. You'll have something to harvest in every season and something blooming for the bees from spring through frost.
• • •
When to Plant: A Region-by-Region Guide
The secret is two simple dates you can look up for your exact ZIP code through NOAA's Climate Normals tools: your last spring freeze and your first fall freeze. Everything else is math.
USDA Plant Hardiness Zones tell you whether a perennial herb can survive winter where you live, based on average extreme minimum winter temperatures.
| Regional herb planting calendar showing recommended indoor start dates, outdoor transplant dates, and direct sow windows by U.S. region Region | Last Spring Freeze | Frost-Tender: Start Indoors | Frost-Tender: Set Out | Cool-Season: Direct Sow | Perennials: Start Indoors |
|---|---|---|---|---|---|
| Northeast | Mid Apr–Late May | Mar–Apr | Late May–Jun | Mar–May & Aug–Sep | |
| Feb–Mar | |||||
| Mid-Atlantic | Late Mar–Late Apr | Feb–Mar | Late Apr–May | Feb–Apr & | |
| Aug–Sep | Jan–Feb | ||||
| Southeast | Feb–Early Apr | Jan–Feb | Mar–Apr | Jan–Mar & Sep–Nov | Dec–Jan |
| Midwest | Mid Apr–Late May | Mar–Apr | Late May–Jun | Mar–May & Aug–Sep | |
| Feb–Mar | |||||
| Great Plains | Mid Apr–Early Jun | Mar–Apr | Late May–Jun | Mar–May & | |
| Aug–Sep | Feb–Mar | ||||
| Southwest | Feb–May (elevation) | Jan–Mar | Mar–May | Feb–Apr & Aug–Oct | |
| Dec–Feb | |||||
| Pacific NW | Late Mar–May | Feb–Mar | Apr–May | Mar–May & Aug–Sep | Jan–Feb |
| California | Feb–Apr (varies) | Jan–Mar | Mar–May | Feb–Apr & Sep–Nov | |
| Dec–Feb |
• • •
Starting Herbs from Seed: The Honest Truth
Starting herbs from seed is one of the most satisfying things you can do as a gardener. Once you understand the basics, it becomes second nature.
"The three things that kill herb seedlings: too little light, too much moisture, and not enough airflow. Fix those three, and you're ninety percent of the way there."
- 1
Start clean. Use new or sanitized trays with drainage holes and fresh, sterile seed-starting mix—never garden soil. This is your single best defense against damping-off.
- 2
Mind the depth. Many herb seeds are surface-sown because they need light to sprout—lavender, thyme, oregano, lemon balm, yarrow, chamomile, and mullein all fall in this camp. For herbs with a specified depth (basil at 1/4", dill at 1/8–1/4"), follow it exactly.
- 3
Use a humidity dome—then ditch it. A dome holds moisture for germination. The second you see green, remove it. Seedlings need airflow, not a sauna.
- 4
Give them warmth. Most herb seeds germinate best between 65–85°F. A heat mat under your trays helps enormously, especially for basil and stevia (70–85°F). Remove the heat once seedlings are up.
- 5
Light, light, light. Seedlings need about 14–16 hours of light per day under grow lights. A little fan blowing gently strengthens stems and discourages fungal problems.
- 6
Water from below. Bottom-watering keeps the surface drier and the stems healthier. Wet stems invite damping-off, and once it starts, you can't cure it—only prevent it.
- 7
Harden off for real. Before transplanting outdoors, spend 7–10 days gradually introducing seedlings to outside conditions. Start in the shade for an hour or two, then increase sun and time each day. Don't skip this step.
Lavender Needs a Cold Nap
Lavender seeds germinate much better with a 30–40 day cold stratification. Seal seeds in a damp paper towel inside a plastic bag and refrigerate. After about a month, sow on the surface and keep at 65–75°F. Patience is part of the lavender deal.
• • •
Meet the Herbs: Top Picks for Kitchen, Teacup, and Bee Garden
The Kitchen Essentials
Basil
Ocimum basilicum
Culinary Pollinator
The basics: Annual. Full sun. Start indoors 4–6 weeks before last frost at 70–85°F; sow 1/4" deep. Sprouts in 6–10 days. Space 8–12". Frost hardy: No.
Growing notes: Pinch flower buds to keep leaves coming—but let a few plants bloom for the bees. Basil and tomatoes are garden soulmates. Watch for basil downy mildew in humid conditions: good airflow and avoiding overhead watering in the evening are your best tools.
Varieties we love: Genovese for pesto, Thai Sweet for curries, Dark Purple Opal for drama.
Cilantro / Coriander
Coriandrum sativum
Culinary
The basics: Annual. Cool-season herb. Sow 1/4–1/2" deep in cool soil; 60–80°F; germinates in 7–10 days. Space 4–6". Bolts in hot weather.
Growing notes: Your best windows are spring and fall. Once summer heat arrives, it bolts fast. Succession sow every 2–3 weeks. When it bolts, let it go to seed—those seeds are coriander. The plant self-seeds readily.
Hot-weather hack: When cilantro gives up in July, switch to papalo. This Mexican herb thrives in heat and has a similar (if bolder) flavor.
Dill
Anethum graveolens
Culinary Pollinator
The basics: Annual. Direct sow 1/8–1/4" deep, 1–2 weeks before last hard frost. 55–75°F; 7–21 days. Space 2–4".
Growing notes: Dill has a long taproot and hates being transplanted. Sow it right where you want it, period. Plant a new batch every 2–4 weeks. Wonderful companion for cucumbers and broccoli. Let swallowtail caterpillars have their share—plant enough for everyone.
Oregano
Origanum vulgare
Culinary Pollinator
The basics: Perennial. Surface sow (needs light); 72–76°F; 7–14 days. Space 10". Prefers hot, dry conditions and somewhat alkaline soil.
Growing notes: Once established, oregano is one of the most reliable herbs in the garden—coming back year after year. Let it flower and the bees will thank you. It dries beautifully for winter use.
Thyme
Thymus vulgaris
Culinary Pollinator
The basics: Perennial, zones 5–9. Surface sow; 60–75°F; 14–28 days. Space 9". Full sun, well-drained sandy soil.
Growing notes: Slow to start but worth the wait. Good airflow is essential—it can "melt out" in hot, humid summers. In colder zones, grow it in containers you can overwinter indoors. The tiny flowers are irresistible to bees.
 Genovese BasilThe pesto essential
 Dark Purple Opal BasilStunning & flavorful
 Thai Sweet BasilSpicy-sweet for curries
 Common ThymeKitchen & garden staple
 Vulgare OreganoClassic Italian flavor
 Common ChivesEasiest herb to grow
The Tea Garden
Chamomile
Matricaria chamomilla
Tea Pollinator
The basics: Annual (German type). Surface sow—needs light. Sow early spring, direct. Space 8–12".
Growing notes: One of the easiest herbs you'll ever grow. The apple- scented blooms make a calming, golden tea. Regular harvesting of the flower heads extends the blooming window. It self-sows freely, so once you plant it, you may have chamomile forever.
Bee Balm / Monarda
Monarda spp.
Tea Pollinator
The basics: Perennial types hardy zones 4–9. Surface sow—needs light. Start indoors 8–10 weeks before last frost. Space 12".
Growing notes: The triple threat of the herb garden: gorgeous flowers, wonderful minty tea, and one of the best pollinator magnets you can grow. Hummingbirds, butterflies, and bees all flock to it. Keep soil consistently moist and give it room to breathe to prevent powdery mildew.
Lemon Balm
Melissa officinalis
Tea Pollinator
The basics: Perennial, zones 3–7. Surface sow; 68–70°F; 7–14 days. Space 12". Full sun to part shade.
Growing notes: The leaves release a bright, lemony fragrance when brushed, and they make what might be the most sublimely refreshing herbal tea you'll ever taste—hot or iced. Easy to start and tolerant of a range of conditions.
Echinacea
Echinacea purpurea
Tea Pollinator
The basics: Perennial, zones 3–8. Sow 1/8" deep; 65–90°F; 10–15 days. Space 8–10".
Growing notes: A must-have for any pollinator or tea garden. The showy purple coneflowers attract butterflies and bees all summer. Leave the spent seed heads for the goldfinches.
 German ChamomileClassic tea
flower
 Green
Lemon BalmCalming lemony tea herb
 Echinacea
PurpureaNative immune booster
 MarshmallowThe
real deal
 Common
MulleinTall & stately medicinal
 White
HorehoundOld-time cough remedy
The Pollinator Powerhouses
Lavender
Lavandula angustifolia
Culinary Pollinator
The basics: Perennial, zones 5–9. Surface sow; 65–75°F; 14–21 days. Space 12". Full sun, excellent drainage. Cold stratify 30–40 days for best results.
Growing notes: Lavender wants hot, dry conditions and soil that drains beautifully. Give it a sunny, well-drained spot—a raised bed with gritty soil, a slope, or a generous container—and it will reward you with fragrant, bee- covered spikes for years.
Yarrow
Achillea millefolium
Tea Pollinator
The basics: Perennial, zones 3–9. Surface sow; 65–75°F; 14–21 days. Space 24".
Growing notes: Yarrow makes you look like a better gardener than you are. It's drought-tolerant, virtually care-free, and the flat flower heads are irresistible to butterflies and beneficial insects. Cut it back after the first bloom for a second round.
Borage
Borago officinalis
Culinary Pollinator
The basics: Annual. Direct sow 1/4–1/2" deep as soon as soil can be worked. 60–80°F; 7–14 days. Space 12".
Growing notes: A pollinator magnet with beautiful star-shaped blue flowers that are edible—freeze them in ice cubes for the prettiest summer drinks you've ever served. Succession plant for a longer bloom. Self-seeds generously.
⚠ Pet Safety Note
Borage is toxic to dogs, cats, and horses. Keep this in mind when choosing where to plant.
 Vera
LavenderTrue English lavender
 Blue
BorageStarry edible flowers
 Red Bee BalmBold color, bold
flavor
 Common
YarrowTough & beautiful
 Mountain
MintPollinator powerhouse
 Spotted
Bee BalmNative wildflower beauty
• • •
More Herbs Worth Knowing
Chives (zones 4–8) — Hardy, easy, practically indestructible. The purple pompom flowers feed pollinators in early summer.
Rosemary (perennial zones 8–11) — In colder zones, grow it in a pot and bring it inside for winter. Surface press seeds with bottom heat. Be patient—rosemary takes its sweet time.
Stevia — Nature's sweetener. Perennial only in zone 10+, but easy to grow as an annual. Surface sow at 70–85°F. Bring indoors before frost.
Lemongrass — Essential for Thai cooking and wonderful in tea. Loves warmth and moisture. Hardy in zones 8b–11; container plant elsewhere.
Papalo — Your summer cilantro replacement. Thrives in exactly the conditions that kill cilantro. Harvest at 8–10" tall.
Horehound (zones 3–9) — Old-fashioned horehound candy and tea start here. Loves poor, dry, well-drained soil.
Marshmallow (zones 3–9) — Yes, the original marshmallow. This tall perennial likes moist soil and has a long history in herbal traditions.
Mullein (zones 3–9) — Dramatic biennial with tall fuzzy spikes. The second- year flower stalks are surprisingly good pollinator plants.
Mountain Mint (zones 3–9) — A native pollinator powerhouse. Fragrant, easy, tough as nails—but can spread aggressively, so give it boundaries.
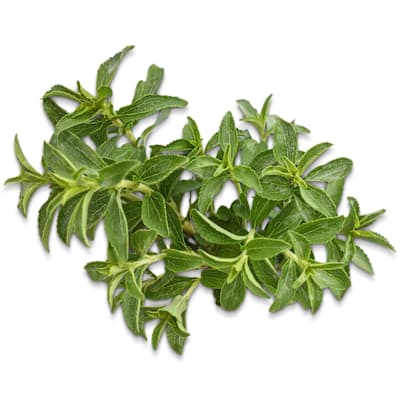 SteviaNature's
sweetener
 LemongrassTropical
citrus flavor
 Toothache
PlantWonderfully weird
 Papalo,
ButterflyMexican cilantro sub
 Slo-Bolt CilantroHeat-tolerant
selection
 Rosy
RosemaryAromatic perennial
• • •
The Art of Succession Sowing (and Sharing with the Bees)
One of the most common mistakes new herb gardeners make is planting everything at once and then wondering why their cilantro disappeared in June. The fix is simple: succession sowing. For dill, plant a new batch every 2–4 weeks from early spring through midsummer. For cilantro, sow every 2–3 weeks in the cool windows.
For perennials like oregano, bee balm, and yarrow, the strategy is even simpler: let them bloom. Designate a few plants for harvest and a few for the bees.
The 30/70 Rule
Harvest from about 70% of your herb plants and let 30% flower freely for pollinators. You get plenty for the kitchen, and the bees and butterflies get their share.
• • •
When Things Go Sideways: Troubleshooting Common Problems
Damping-Off
The number one killer of herb seedlings, caused by soil-borne pathogens that thrive in wet, stagnant conditions. Infected seedlings won't recover. Prevention is everything: sterile containers, fresh seed-starting mix, bottom-watering, airflow from a small fan, and removing humidity domes as soon as seeds sprout.
Bolting
Cilantro bolts when it gets hot—that's just its nature. You can slow it down with consistent moisture and some afternoon shade, but eventually it's going to flower. Schedule cilantro for cool windows, succession sow, and switch to papalo for summer.
Powdery Mildew on Bee Balm
If there's one thing to know about Monarda, it's that powdery mildew will find it eventually. The white coating on leaves is unsightly but rarely fatal. The fix: thin plantings for air circulation, water at the base, keep soil consistently moist, and remove badly infected foliage at season's end.
Basil Downy Mildew
Yellowing leaves with gray fuzzy spores underneath. Unlike powdery mildew, this water mold can arrive via infected seed, transplants, or on moist air currents. Your defense: maximize airflow, avoid watering leaves late in the day, remove infected plants quickly, and plant with generous spacing in full sun.
Aphids
Soft-bodied sap-suckers that especially love dill once it flowers. Scout weekly. A strong blast of water knocks them off. Conserve beneficial insects—ladybugs, lacewings, and parasitic wasps are your allies.
• • •
Saving Herb Seeds: Keep the Cycle Going
One of the best things about growing open-pollinated heirloom herbs is that you can save the seeds and plant them again next year—for free. Seed saving is how these varieties have survived for generations. Let healthy plants go to seed, allow seed structures to dry fully on the plant, then clean, label, and store in a moisture-tight container somewhere cool, dry, and dark.
Seed-Saving Quick Reference
Harvest: From the healthiest, most typical plants only.
Dry: Let seed heads mature on the plant; finish indoors if needed.
Clean: Winnow to separate seed from chaff.
Label: Crop name, variety, and date. (Trust us—you will not remember in February.)
Store: Sealed container, cool/dry/dark. 35–40°F and less than 40% humidity is ideal.
Test: Older lots? Do a simple germination test before planting season.
• • •
Season Extension: Getting More from Your Herb Garden
Row covers are the unsung heroes. A lightweight floating cover can add roughly 2–8°F of frost protection—sometimes all you need to carry cilantro and dill through a late cold snap.
Low tunnels —portable covered structures less than four feet tall—protect from cold, wind, hail, and excessive rain. In the Great Plains and Midwest, they're invaluable.
Container growing opens up a world of microclimate management. Rosemary in zone 5? Grow it in a pot and bring it inside.
Winter sowing is wonderful for perennial herbs. Sow seeds in recycled milk jugs in late winter, set them outside, and let nature handle stratification and timing. Hardy perennials like echinacea, yarrow, bee balm, and mountain mint are perfect candidates.
• • •
Brewing the Perfect Cup: From Garden to Teacup
Homegrown herb tea—technically called a tisane —is an entirely different thing from the box at the grocery store. The flavor is brighter, the aroma fills your kitchen, and the satisfaction of drinking something you grew yourself ten minutes ago is hard to overstate.
The Golden Rules of Brewing
Fresh vs. dried: Fresh herbs make a lighter, more aromatic cup. Dried herbs are more concentrated. The general rule: use about three teaspoons of fresh herbs or one teaspoon of dried per cup of water.
Water temperature matters. Bring your water to a boil, then let it cool for about 30 seconds before pouring. Water that's just off the boil extracts flavor without cooking the delicate oils out of the leaves.
Cover while steeping. A lid or small plate over your cup traps the aromatic steam—those are the volatile essential oils that carry most of the flavor. Without a cover, they float away into your kitchen instead of into your tea.
Steep times vary. Most leafy herbs (mint, lemon balm, bee balm) do well with 5–10 minutes. Chamomile and lavender can get bitter if over-steeped—keep them to 3–5 minutes. Seeds and roots need longer, around 10–15 minutes, simmered gently.
The Crush-and-Tear Trick
Before adding fresh herbs to your cup, gently tear or crush the leaves between your fingers. This releases far more flavor into the water. Don't go overboard—you want to bruise them, not pulverize them.
Our Favorite Tea Blends
Think of blending like cooking: you want a base herb for body, a star ingredient for the main flavor, and an accent to add depth or surprise.
The Evening Wind-Down
Calming, floral, and golden. A before-bed classic.
Base: Chamomile flowers (2 tsp fresh or 1 tsp dried)
Star: Lemon balm leaves (1 tsp fresh)
Accent: A few lavender buds (just a pinch—lavender is powerful)
Steep: 3–5 minutes, covered. Sweeten with honey if you like.
The Citrus Garden
Bright, lemony, and refreshing. Wonderful hot or iced.
Base: Lemon balm (2 tsp fresh)
Star: Lemongrass, chopped (1 tsp)
Accent: A small sprig of fresh thyme
Steep: 7–10 minutes, covered. Add a slice of fresh lemon to serve.
The Pollinator’s Reward
Spicy, minty, bold. Named for the bees who made it possible.
Base: Bee balm leaves and flowers (2 tsp fresh)
Star: Fresh mint (1 tsp)
Accent: A thin slice of fresh ginger root
Steep: 5–8 minutes, covered. Fantastic iced in summer.
The Immunity Boost
Earthy, warm, and grounding. A cold-season favorite.
Base: Echinacea petals and leaves (2 tsp dried)
Star: Fresh rosemary (1 small sprig)
Accent: A cinnamon stick and a teaspoon of honey
Steep: 10–12 minutes, covered. Simmer the echinacea gently first.
The Ozark Sweet Tea
Our Baker Creek take on iced herbal tea. Feeds a porch full of friends.
Base: Fresh mint, a generous handful (about 1/4 cup)
Star: Chamomile flowers (2 tbsp fresh)
Accent: 3–4 fresh stevia leaves (nature's sweetener)
Method: Steep in a quart of just-boiled water for 15–20 minutes. Strain, cool, pour over ice. Add a sprig of lemon balm to each glass.
Making Iced Herb Tea
The trick to iced herbal tea that doesn't taste watered down: brew it double- strength. Use twice the herbs you'd normally use for hot tea, steep until rich, strain, then pour over a full glass of ice. The melting ice dilutes it to perfect strength. You can also do a sun tea—fill a glass jar with herbs and cold water, set it in the sun for 3–4 hours, and strain.
Herb Ice Cubes
Freeze small herb sprigs or edible flowers (like borage stars or chamomile heads) into ice cube trays with water. Drop them into iced tea, lemonade, or sparkling water. They look beautiful, they flavor the drink as they melt, and they're the kind of thing that makes people say, "You grew those?"
Drying Herbs for Year-Round Tea
Harvest in the morning, after the dew dries but before the midday heat. This is when essential oil concentration peaks in the leaves.
Harvest before flowering for the most potent leaves. Once a plant puts its energy into flowers and seeds, the leaf flavor changes. (The exception: chamomile, bee balm, and lavender, where the flowers are the tea.)
Air-dry in small bundles. Tie 4–6 stems together and hang upside down in a warm, dry spot with good airflow and no direct sunlight. Most herbs dry in 4–8 days.
Store whole, crush later. Whole dried leaves hold their flavor far longer than pre-crushed herbs. Store in airtight glass jars in a cool, dark place, and crush only when ready to brew.
• • •
Harvest Like a Pro: Tips for Maximum Flavor
Timing Is Everything
Time of day: Harvest in the morning, after the dew has dried but before the sun gets hot—usually between 8 and 10 AM. Overnight, plants replenish their essential oils. By mid-morning those oils are at peak concentration.
Time of season: For leaf herbs (basil, oregano, thyme, mint, lemon balm), harvest just before the plant flowers. For flower herbs (chamomile, lavender, bee balm), pick the blooms just as they fully open.
Time of growth: Don't harvest from tiny plants. Wait until the herb has at least 6–8 inches of growth and several sets of true leaves. Once established, you can safely harvest up to a third of the plant at a time.
The Right Cut
Use sharp, clean tools. Kitchen scissors or garden snips—never pull or tear. A clean cut heals fast; a ragged tear invites disease.
Cut above a leaf node. This is the single most important harvest technique. The plant responds by sending out two new branches from that spot—free multiplication.
Harvest from the outside in. Take the older, outer leaves and stems first, leaving the younger inner growth to keep developing.
✓ Do This
Harvest in the morning after dew dries
Cut above a leaf node with sharp scissors
Take no more than one-third at a time
Pick just before flowering for strongest flavor
Use or preserve herbs the same day
✗ Not This
Harvest in afternoon heat or after rain
Pull or tear stems by hand
Strip the plant bare all at once
Wait until flowers have gone to seed
Let cut herbs sit out on a hot counter
Preserving the Harvest
Freeze in olive oil. Chop fresh herbs, pack into ice cube trays, cover with olive oil, and freeze. Drop one into a pan whenever you're cooking—instant herb flavor for pasta, roasted vegetables, or bread. These keep for 4–6 months.
Freeze whole sprigs. Spread clean, dry herb sprigs on a parchment-lined baking sheet and freeze flat. Once solid, transfer to a freezer bag. The flavor holds up remarkably well in cooked dishes.
Make herb salt. Pulse fresh herbs with coarse sea salt (roughly 1 part herbs to 4 parts salt). Spread on a baking sheet, let dry, and store in a jar. Rosemary salt, thyme salt, and basil salt are all incredible.
Infuse vinegar. Pack a clean jar with fresh herbs, cover with white wine vinegar or apple cider vinegar, and let sit in a cool dark place for 2–4 weeks. Strain and use for salad dressings. It makes a beautiful homemade gift, too.
• • •
Companion Planting: Herbs That Help Each Other (and Your Veggies)
Herbs aren't just for the kitchen and the teacup—they're some of the hardest- working pest controllers, pollinator attractors, and soil improvers in the whole garden.
Herbs in the Vegetable Garden
Basil + Tomatoes: The classic pairing. Basil's strong scent helps repel aphids, hornworm moths, and whiteflies from tomato plants.
Dill + Cucumbers & Brassicas: Dill's feathery umbel flowers attract beneficial insects. Plant near cucumbers, broccoli, and cabbage.
Thyme + Cabbage Family: Research found thyme planted near brassicas is effective for deterring cabbage worms and loopers. Its low, spreading habit also makes it a useful living mulch.
Rosemary & Sage + Brassicas & Carrots: These strongly aromatic Mediterranean herbs confuse pest insects. Rosemary in particular has shown effectiveness against carrot flies and cabbage moths.
Chives + Everything: Chives repel aphids and carrot flies, and their cheerful purple flowers attract beneficial pollinators early in the season.
Flowering Cilantro & Dill: When you let these herbs bolt and flower, their umbrella-shaped blooms become landing pads for hoverflies, ladybugs, and parasitic wasps. Instead of pulling bolted cilantro, leave it—it's doing its best work.
The Diversity Principle
The single most effective companion planting strategy isn't any one magical pairing—it's diversity itself. The more different types of plants growing together, the fewer pest problems you'll have. Scatter herbs throughout your vegetable beds, not just in their own separate corner.
Herbs That Need Their Own Space
A few herbs don't play nicely with others. Mint spreads by underground runners and will cheerfully take over anything in its path—always grow it in its own container. Lemon balm and mountain mint have similar ambitions. Fennel releases compounds that can inhibit the growth of nearby plants—keep it in a pot or separate bed.
• • •
No Yard? No Problem: Growing Herbs in Containers
You don't need a big garden to grow great herbs. Some of the best herb gardens we've ever seen were on apartment balconies, front stoops, and sunny windowsills. Herbs are compact, shallow-rooted, and perfectly happy in pots.
Container Basics
Size: Most herbs need a container at least 6 inches deep, but 10–12 inches is better. A 12" wide container can comfortably hold 3–4 different herbs—more than enough for a useful kitchen garden.
Drainage: Non-negotiable. Every container needs drainage holes. Terra cotta pots are excellent because they breathe—the porous walls help regulate moisture and prevent root rot.
Soil: Use a good-quality potting mix, not garden soil. For Mediterranean herbs like lavender, rosemary, thyme, and oregano, mix in extra perlite or coarse sand.
The Best Herbs for Containers
Easy wins for beginners: Basil, chives, mint, parsley, and thyme are all extremely container-friendly. If you've never grown anything before, start with chives—practically indestructible.
Tea garden in pots: Chamomile, lemon balm, mint, and stevia make a complete tea garden in just four pots on a sunny balcony.
Overwintering tender herbs: Rosemary, lemongrass, and stevia can't survive winter in most of the country, but they do beautifully in containers you can move inside when frost threatens.
Two-Pot Kitchen Garden
Pot one (dry-loving): Rosemary, thyme, and oregano. Pot two (moisture- loving): Basil, parsley, and chives. These six herbs cover about 80% of what you'll ever need in the kitchen.
Grouping Herbs in Containers
When planting multiple herbs in one pot, the golden rule is: group by water needs. Mediterranean herbs like it dry and lean. Moisture-loving herbs want consistent water and richer soil. Mixing these two groups leads to one being overwatered or the other being parched.
Vertical and Creative Growing
Short on floor space? Think up. Hanging baskets work beautifully for trailing herbs like thyme and oregano. Wall-mounted pocket planters or tiered shelving can triple your growing space in a few square feet. Even a south-facing window with 6+ hours of sun can keep a small collection of herbs growing year-round.
Rosy
RosemaryAromatic perennial
 SpearmintClassic cool
flavor
Green
Lemon BalmCalming lemony tea herb
• • •
The Takeaway
An herb garden doesn't have to be complicated. A few square feet, a handful of well-chosen varieties, and a little attention to your local freeze dates—that's all it takes. The kitchen rewards are immediate. The first cup of homegrown chamomile or lemon balm tea is a revelation. And once you see a patch of blooming oregano alive with pollinators, you'll understand why people have been growing these plants for thousands of years.
Every one of these herbs is open-pollinated, which means the seeds you save this fall can be planted again next spring, or shared with a friend. That's the beauty of heirloom gardening—it's meant to be passed along.
So start where you are. Even a couple of pots on a sunny step will do. Plant something that feeds you, something that makes good tea, and something for the bees. Next year, plant a little more. Before you know it, you'll have a garden that's earning its keep three times over.
"An herb garden is the most generous thing you can grow. It feeds you, it heals you, it feeds the bees, and it gives you seeds to start the whole thing over again."
Ready to Grow?
Browse our full collection of heirloom herb seeds—all open-pollinated, all shipped free.


